| | reviving the G |  |
|
+6xCONWRATHx Big Ben nismos13silvia BusinessMan_24 squirlz slacker 10 posters |
|
| Author | Message |
|---|
slacker

Posts : 86
Join date : 2009-11-21
Location : Madcity area
 | | Subject: reviving the G Fri Apr 02, 2010 10:13 am | |
| so I've had this lowport DE sitting now for about a year after I lost oil pressure in the leaky, burning highport that was in the car when I bought it. I finally had some time to tear down the lowport and do some gaskets and seals to give me some confidence that this thing will last me a few years. This motor supposedly has 100k or so on it. It was pretty dirty when I picked it up but after a few cans of foamy engine bright and a little pressure washing it's looking respectable. I'll be hosing it down in aluminum toned engine enamel for a lustery look in the next couple days.. I can't paint much until I get my front cover o-ring from Zimbrick but they're taking for god damn ever to get it to me along with my main seals. I will be using GregV from now on as I've heard nothing but good things. Hoping to have everything back together, cleaned and painted in the next week so I can get our shop at home cleaned up and prepped for the swap. If anyone is interested in helping, I'll gladly offer a number of beverages of your choice and do a grill out. we've got a kick ass fire pit and a hot tub too if that seals the deal  I really just want to get the thing back on the road so I'm not stuck with driving my gas guzzling 4.3l s10 once I go back to work in a month as I have a ~60 mile round trip commute daily. It's not LSD so I'm not planning on doing too much with it but I'd like it to be respectable enough to take to a meet or two. 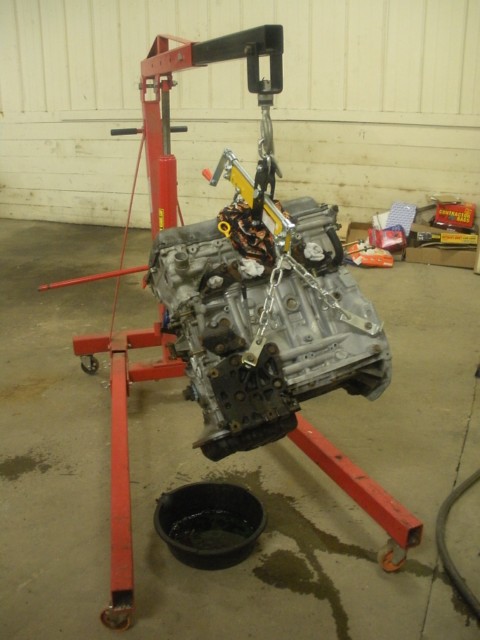 my improvised engine stand  not super clean but it could be worse.. I cleaned it up a bit | |
|
 | |
squirlz

Posts : 384
Join date : 2009-11-19
Age : 43
Location : New Glarus, WI
| | Subject: Re: reviving the G Fri Apr 02, 2010 11:02 am | |
| I have an extra o-ring if you need one. Lets see this thing get back on the road. | |
|
| | |
BusinessMan_24

Posts : 299
Join date : 2009-11-19
Age : 36
Location : Kaukauna, WI
| | Subject: Re: reviving the G Fri Apr 02, 2010 11:49 am | |
| | |
|
| | |
slacker
Posts : 86
Join date : 2009-11-21
Location : Madcity area
| | Subject: Re: reviving the G Fri Apr 02, 2010 10:26 pm | |
| Nick- yes please! I've been waiting for DAYS.
businessman- I'm just south of madison. | |
|
| | |
nismos13silvia
Posts : 326
Join date : 2009-11-22
Location : Madison, WI
| | Subject: Re: reviving the G Sat Apr 03, 2010 12:21 am | |
| | |
|
| | |
slacker
Posts : 86
Join date : 2009-11-21
Location : Madcity area
| | Subject: Re: reviving the G Sat Apr 03, 2010 3:17 am | |
| it's an early '93. It's charcoal with black leather. The interior is a little beat up but all in all it's not that bad. It needs some body work tho, the rear passenger door is rotted along with the truck lid but both of which I have new parts for. They are just the wrong color grey..
If this car was a 93.5 it would have been a g20t but alas, not the case. The only option I wish it had is a sunroof. No pics of the car until it gets hosed off!! | |
|
| | |
slacker
Posts : 86
Join date : 2009-11-21
Location : Madcity area
| | Subject: Re: reviving the G Sun Apr 11, 2010 3:12 am | |
| Making some progress since I have my crank seals now and there's room in the shop to work again! I pulled the intake cam from my highport and checked it out. The lobes actually looked cleaner than the exhaust cam out of the lowport. I was putting all of the parts back in the head (cams, oilers, caps, etc.) and found that getting the timing chain on is a little more of a project than I had anticipated.. The intake cam gear is so close to the aluminum casing of the head that I had to install the timing chain onto the gear then install the gear on the cam.. I figured this out after I torqued the gear bolt  I had to pull the timing chain once or twice to get it on correctly but it finally worked out. I'm looking for a little confirmation on how it currently is. I checked the colored links and lined all of them up to the corresponding mating marks on the gears but I'm still not sure that it's kosher... 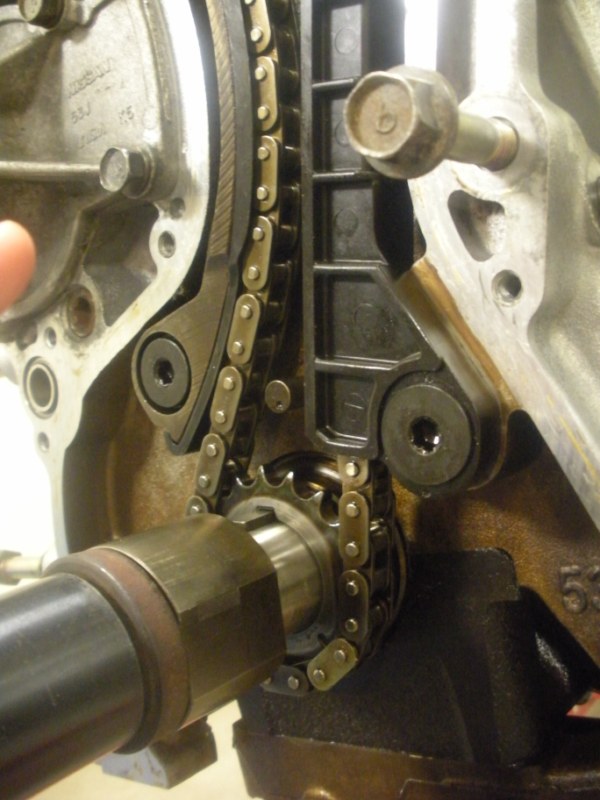 crank is at TDC with the mating mark @~5 o'clock. what is that peg just above the crank gear? right in between the chain guides..  I first installed the gears without the chain and let them sit where they were comfortable in the aprox. places they needed to be. I lined the chain up and put the tensioner in. The tensioner unlatched and put tension on the chain but there was a bit of slack in the chain between the cam gears. I turned each gear with a wrench and the tensioner came out an extra click or two and then everything looked good. DOES THIS LOOK ALRIGHT? I can hear it building compression when I turn it over by hand but I get nervous with this sort of stuff  | |
|
| | |
slacker
Posts : 86
Join date : 2009-11-21
Location : Madcity area
| | Subject: Re: reviving the G Wed Apr 28, 2010 3:18 am | |
| update: 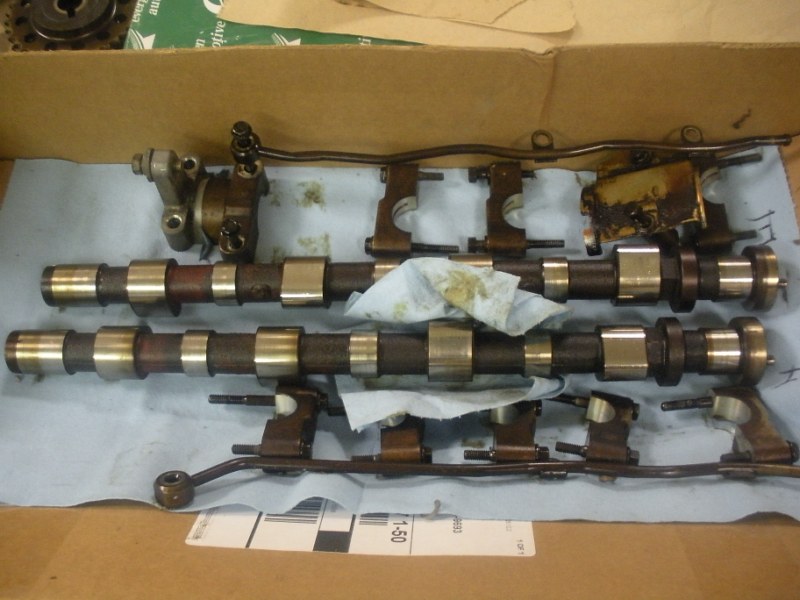 The cams could finally be reinstalled. I had the highport cam out of my other motor waiting. I polished the cams lobes and rocker arms before reassembly. The lifters were all bled and reinstalled and SAE 50 was applied to all cam and cap surfaces. I also opted to inject a little oil down each passage in the head just for security. 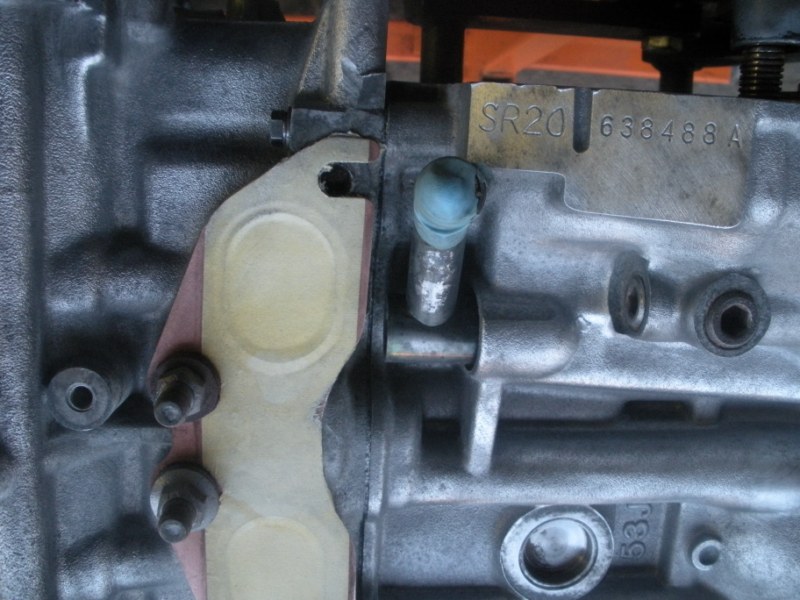 I didn't notice until I had almost everything prepped that I had a broken exhaust stud, seen just to the left of the SR20 stamping on the block. Luckily, the big tool box comes equipped with some MAC brand easy outs. A little action with the right sized drill bit and 10 seconds with the easy out and I was back on schedule to keep painting. 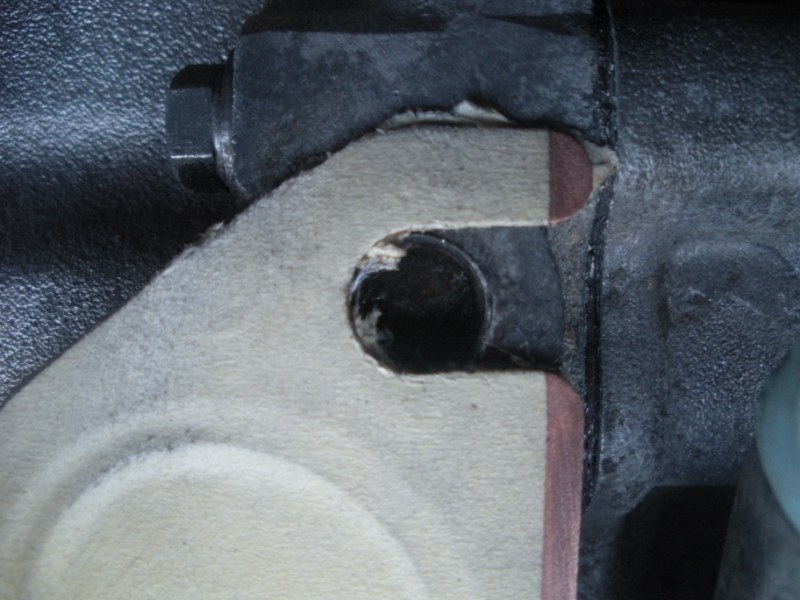 Kinda hard to see but it's in there. 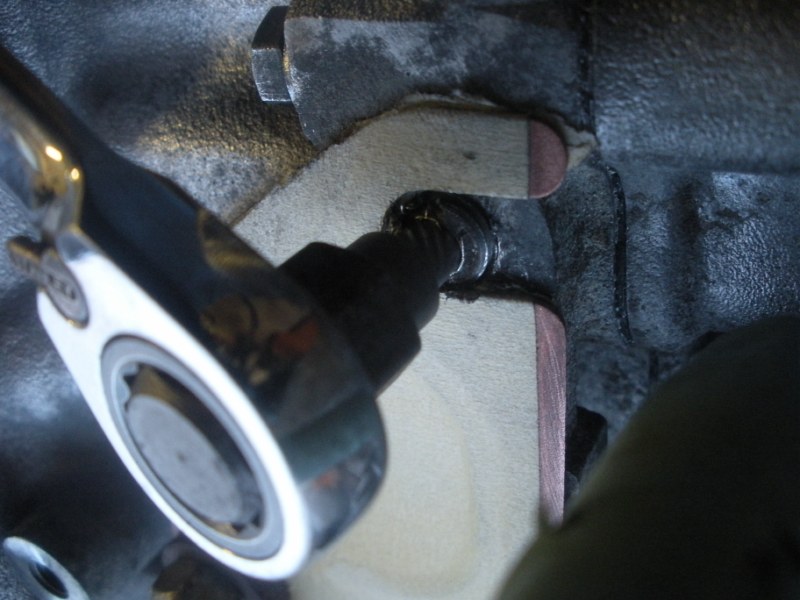 a close up of the easy out doing it's thang. 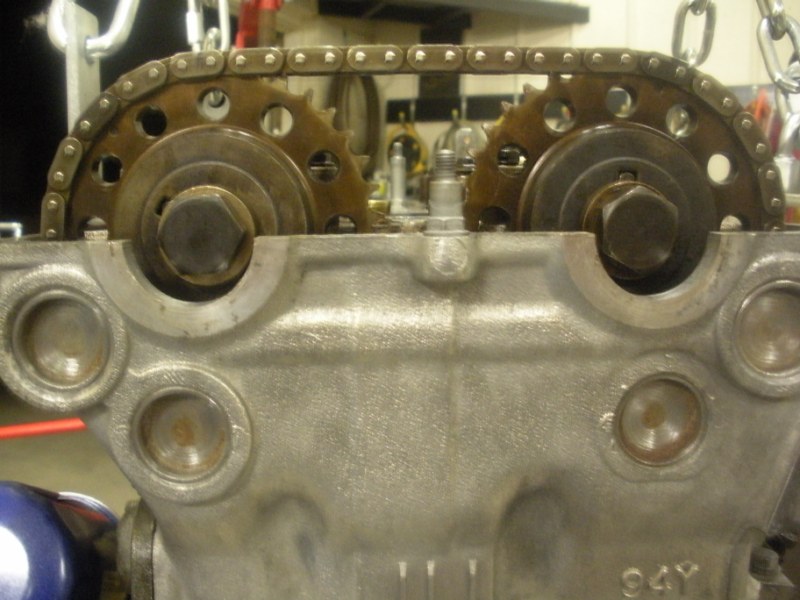 I never did find out one way or another if this alignment of the chain is correct but I'm going to go with it unless I hear otherwise. 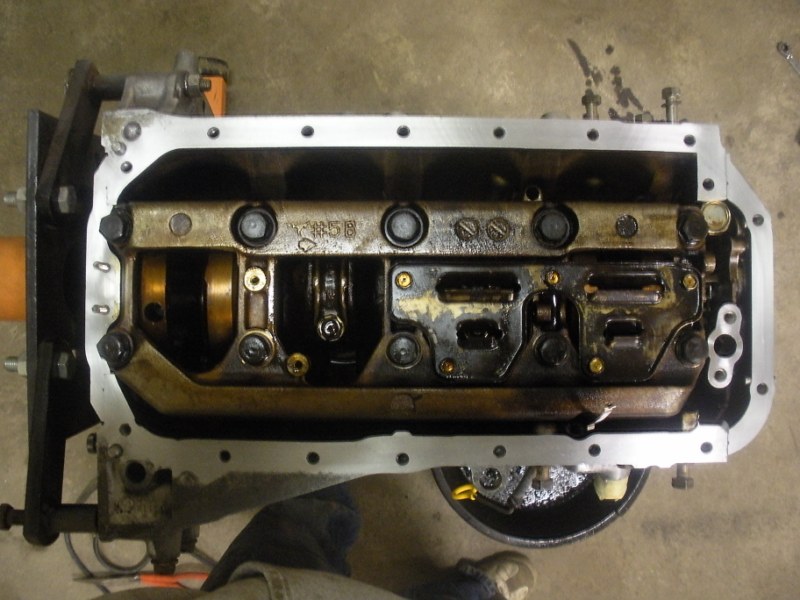 a pic of the rotating assembly with the motor flipped while on the engine stand. I used to use a green rubber pad on the angled die grinder to clean up mating surfaces but I've found that 3M pads work rather well on aluminum. Just don't grind in too hard 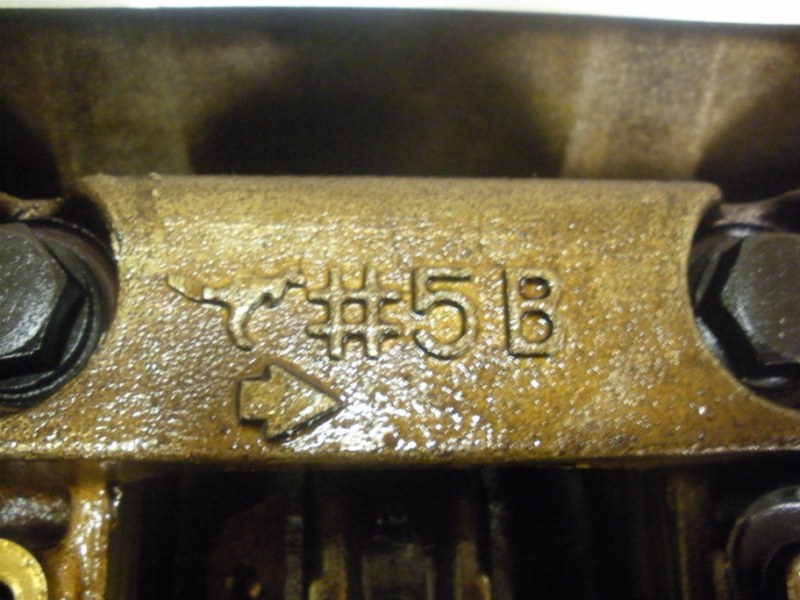 Roo. | |
|
| | |
slacker
Posts : 86
Join date : 2009-11-21
Location : Madcity area
| | Subject: Re: reviving the G Wed Apr 28, 2010 3:37 am | |
| cleaning up of parts: 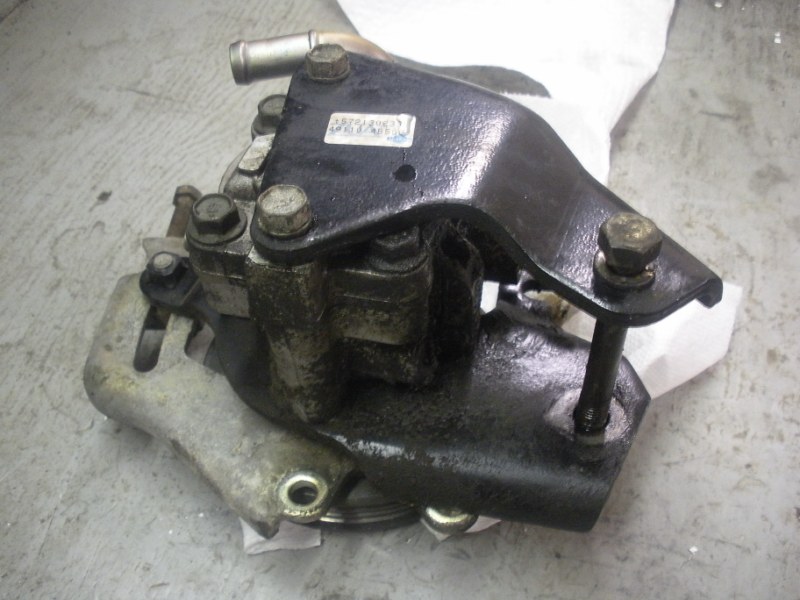 The power steering pump was pretty grimy. Nothing a little disassembly/foamy engine bright/plastic scrub brush/medium pressure wash/prime/engine enamel can't fix!! 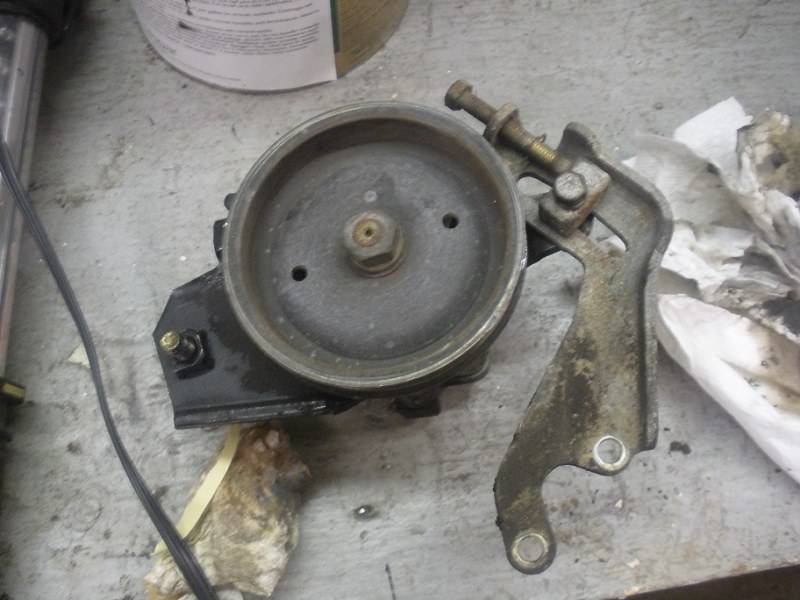 a shot of the front of the PS pump. the brackets and such were all corroded and rusty. it's amazing what a little sand blast action can do to make something paintable. 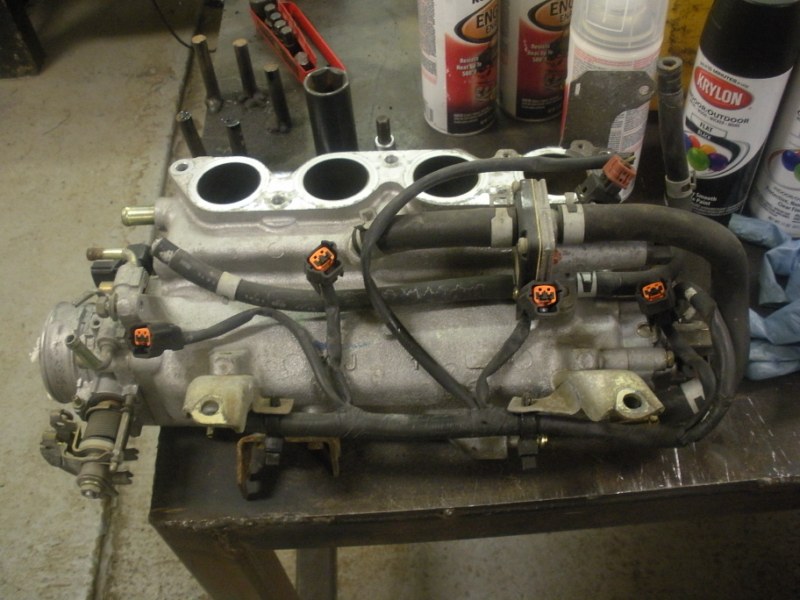 The plenum needed to be stripped in order to be prepped properly. The injector/knock harness was removed and all sensors/vacuum nipples were covered. 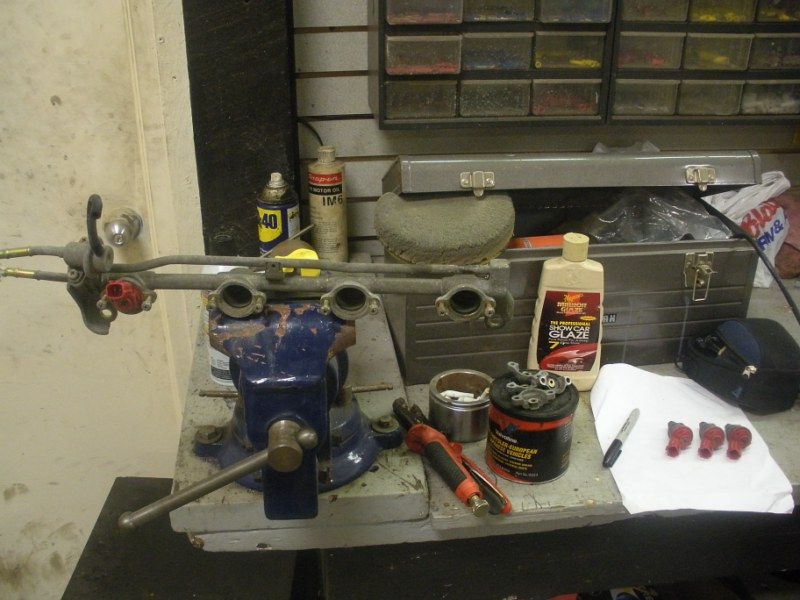 The injectors were all pulled so the factory rail could be prepped and painted as well. caps were reinstalled with paper towel stuffed into the injector cavity. the injector openings on the bottom of the cavity were also taped off being as that surface needs to seal to the rubber grommets located in each runner near the head. 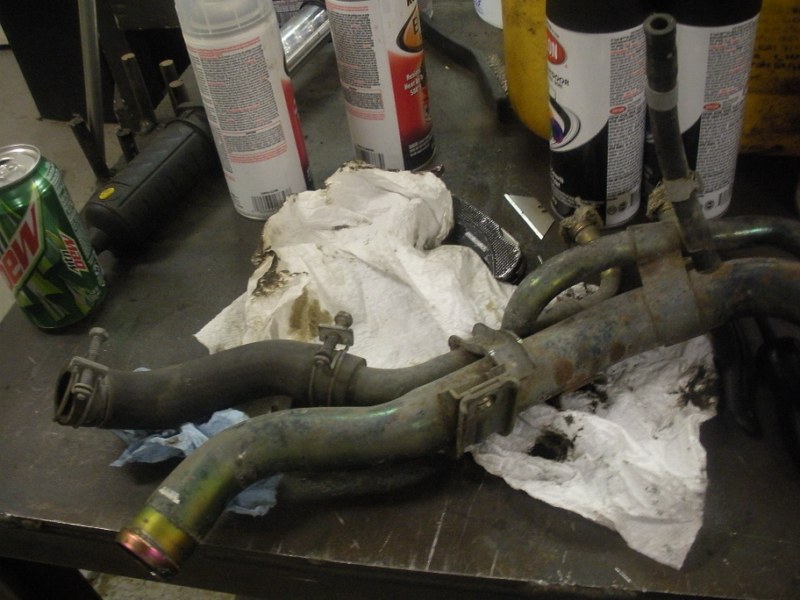 the coolant lines that run around the motor were pretty gnarly as well. Again, the openings to all of the pipes were taped off and all rubber hoses were removed and cleaned. The assembly was then sand blasted and blown out with compressed air before being painted and blown out again before being reinstalled. 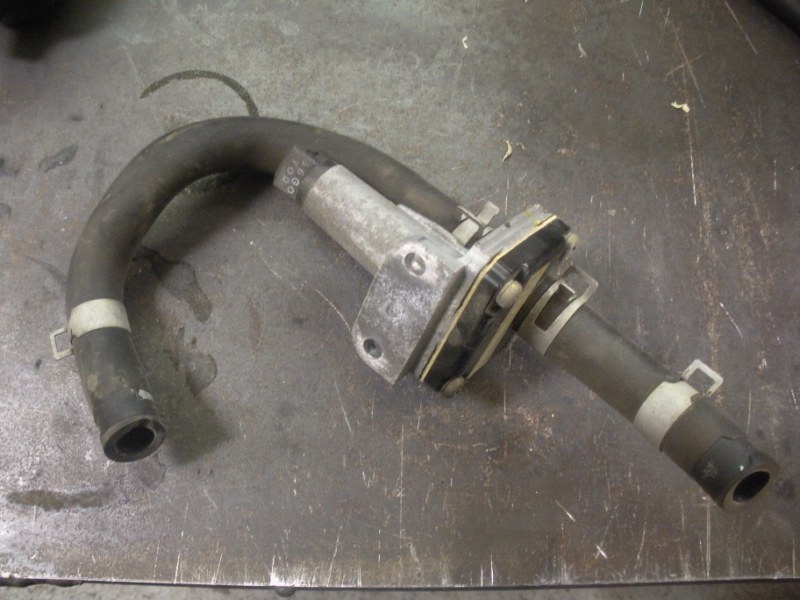 I also went so far as to paint the idle control valve as well. I pulled every hose and cleaned it off with a rag spritzed with armor all. I will most likely replace many of the hoses anyway as I hear some particular hoses are prone to failure. | |
|
| | |
slacker
Posts : 86
Join date : 2009-11-21
Location : Madcity area
| | Subject: Re: reviving the G Wed Apr 28, 2010 4:12 am | |
| Motor and parts prep:  here's the plenum with the harness removed. all that is left to do is remove the two rubber hoses and prep the surface. I did take the time to clean out the plenum as well. It should be common policy as I've read on other forums. It's common for gunk to build up between your throttle body and your valves so I made sure that all the inner surfaces were as clean as I could get them without going too crazy. 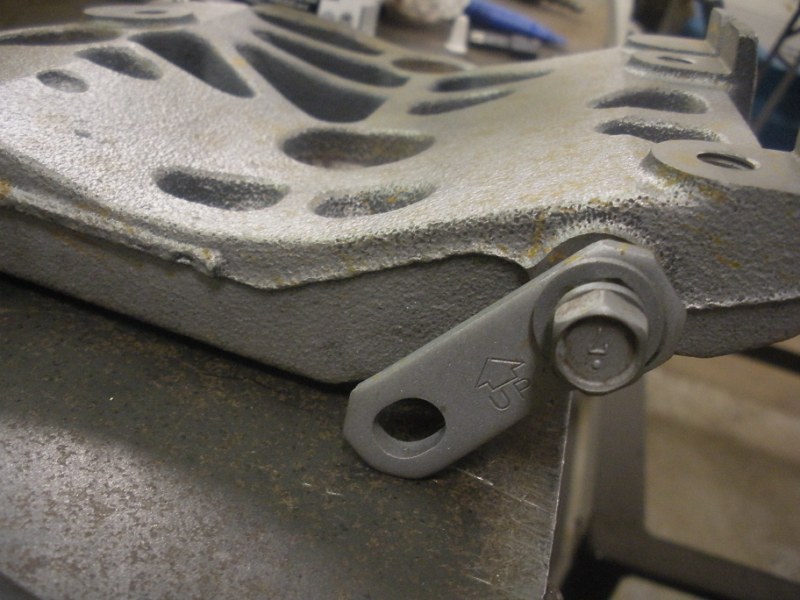 a pic of that massive chunk of cast iron that attaches to the front of the motor to hold the alternator. Notice the indicator on the small bracket that connects this piece to the upper oil pan. It specifies ^'up'. You tend to run low on blinker fluid if you re-install this upside down. 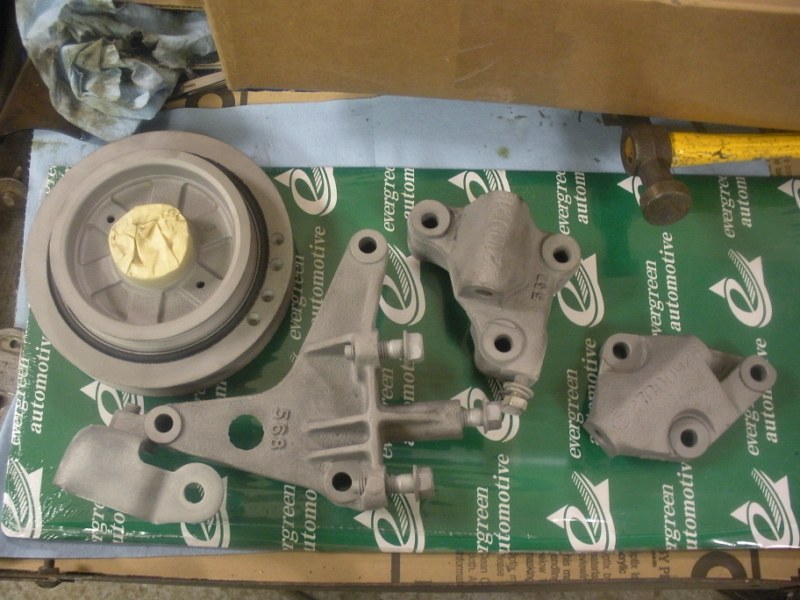 a shot of all of the rest of the cast iron parts that have been sand blasted and will be prepped for black gloss paint just to add a little contrast to things. 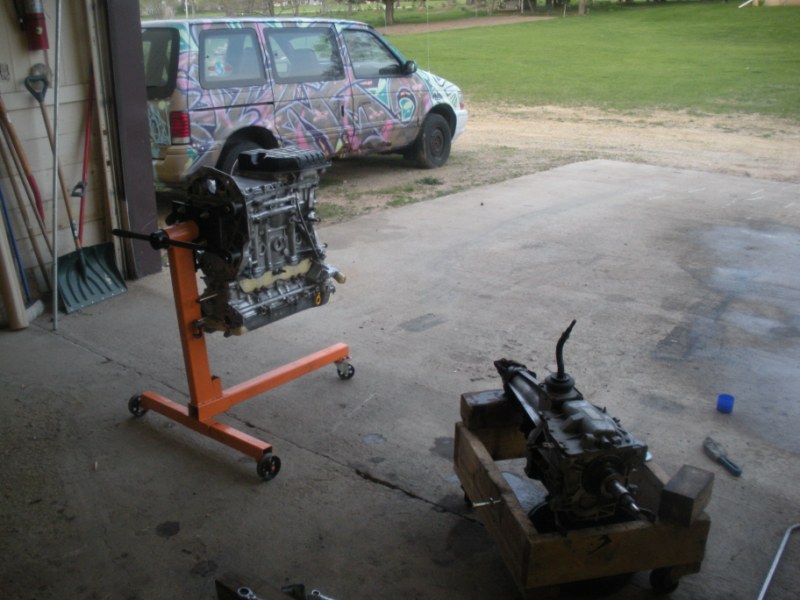 the motor on a friend's stand. I'll have to get one for when I tare down my 350ci small block chevy. You can see the T-5 trans that will be going behind my chevy 235 I6 sitting on a 'custom' wooden cart. Also, be sure to pay homage to the almighty graffiti van in the background. 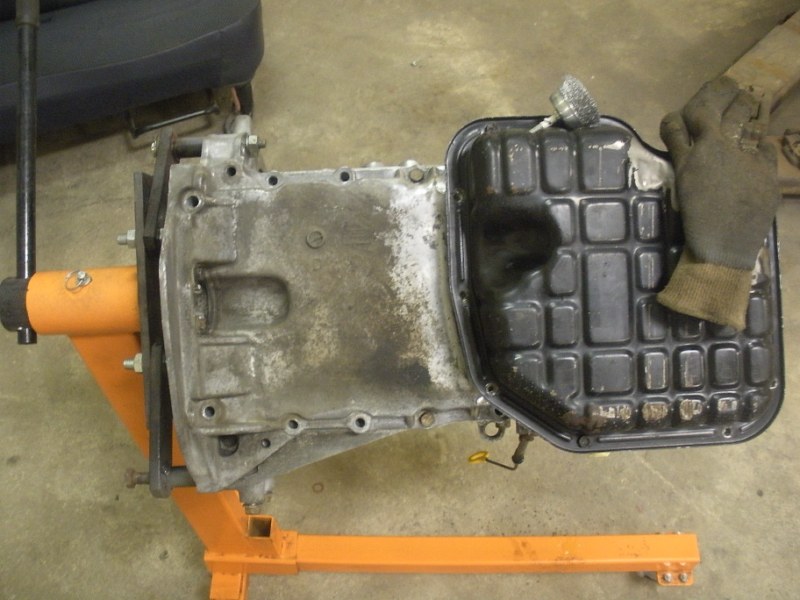 The bottom side of the aluminum oil pan was pretty nasty. I used a wire brush attached to a power drill. Took maybe 5 or so minutes to get the following results... 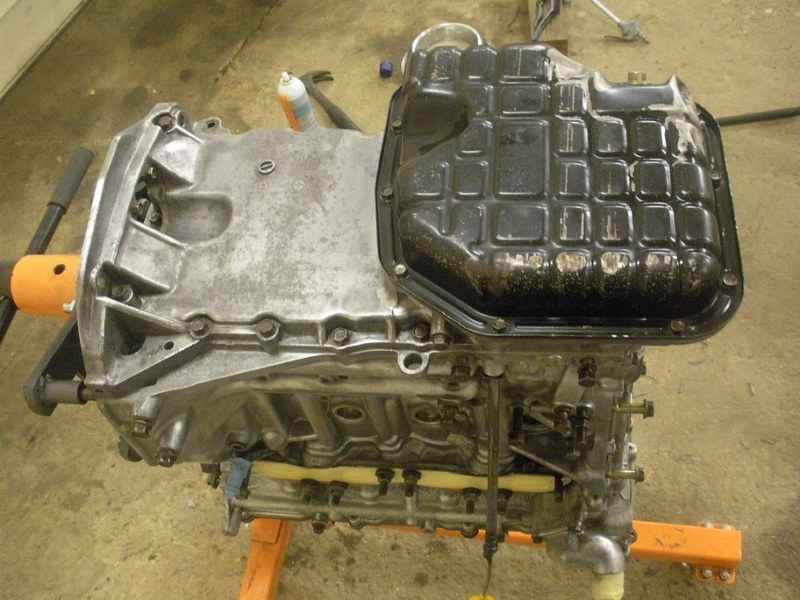 a little bit of scrubbing with a scotch brite pad was needed too to get into some areas that the wire brush couldn't get to. 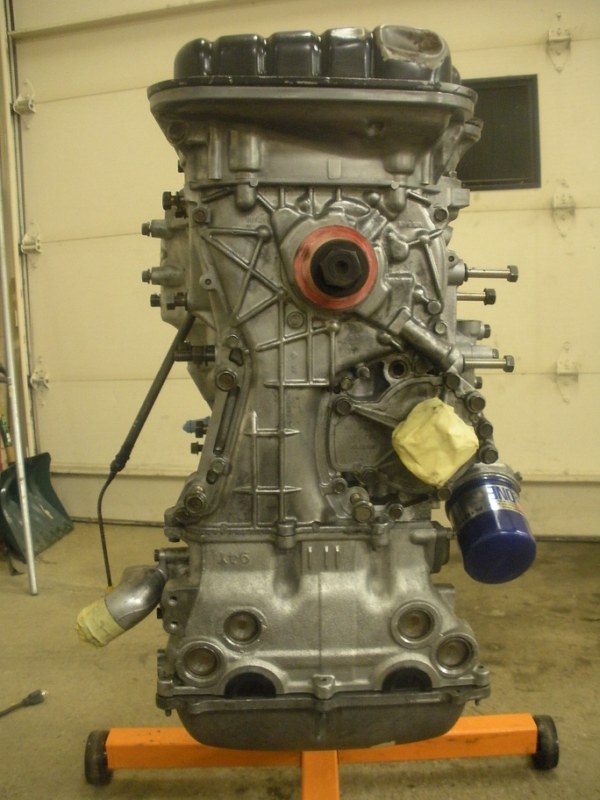 it was nice to be able to flip the motor to ensure I was able to clean up all the nooks and crannies. my custom front crank seal protector is a roll of scotch tape tunneled out so it's in the shape of a funnel. it was even water tight with the crank bolt tightened by hand! 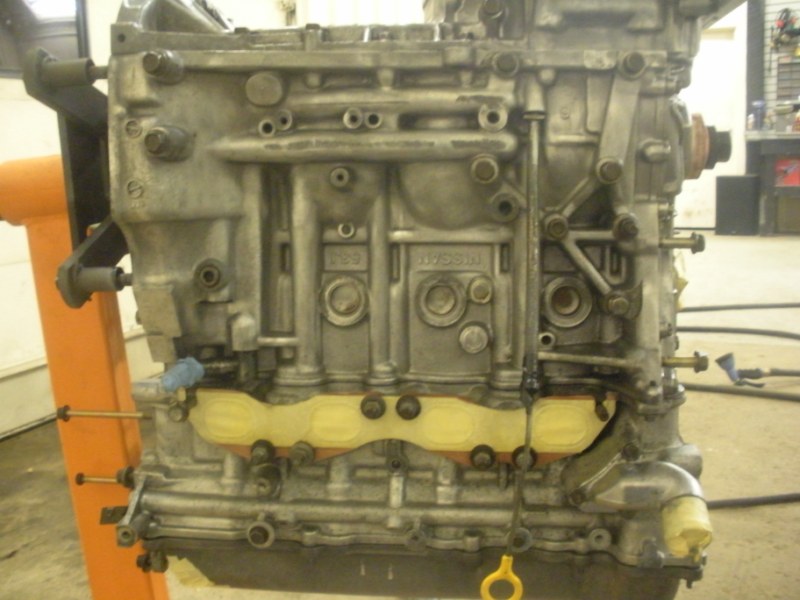 again, being able to get at the bottom side of a lot of these ribs ensured I got that block as clean as I could with the tools that I had. The oil was drained well ahead of this point for those of you who would probably inquire 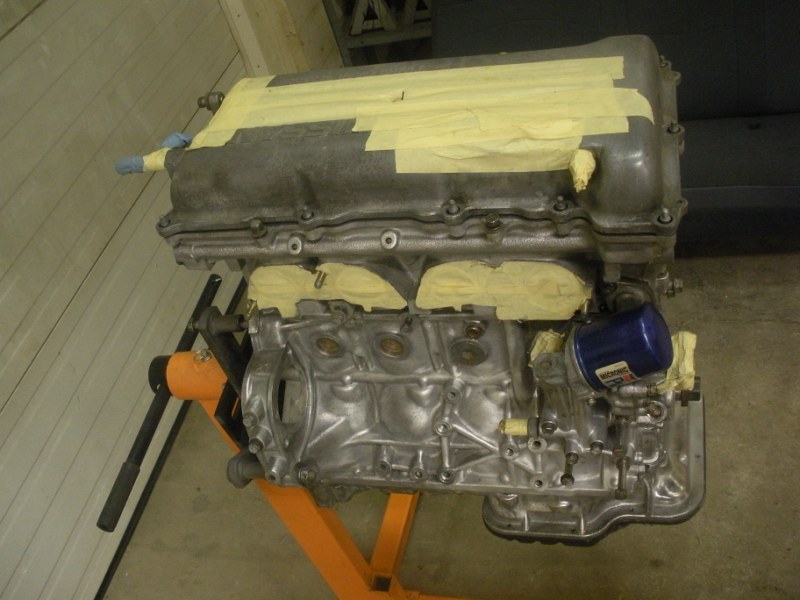 I got 'er flipped back over and double checked that all the tape was still holding on after the last bath and blow down it received. 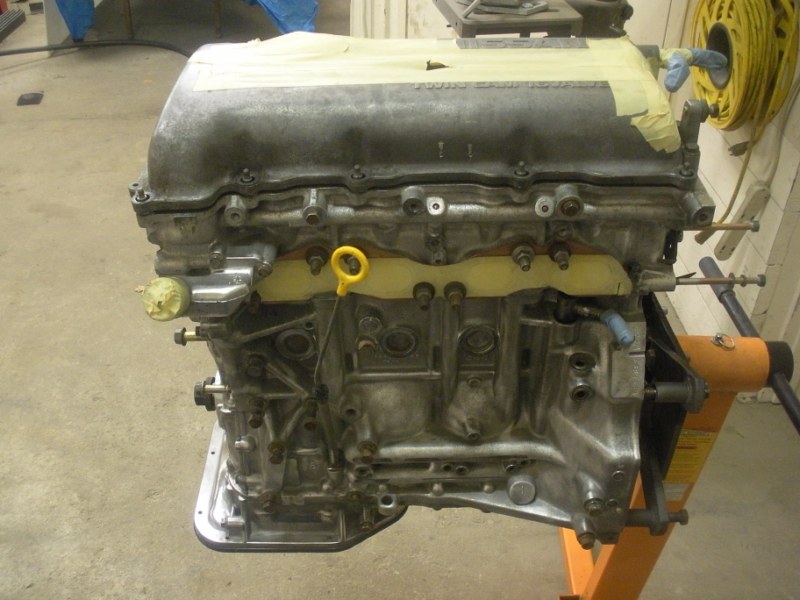 Exhaust side of the block prepped. 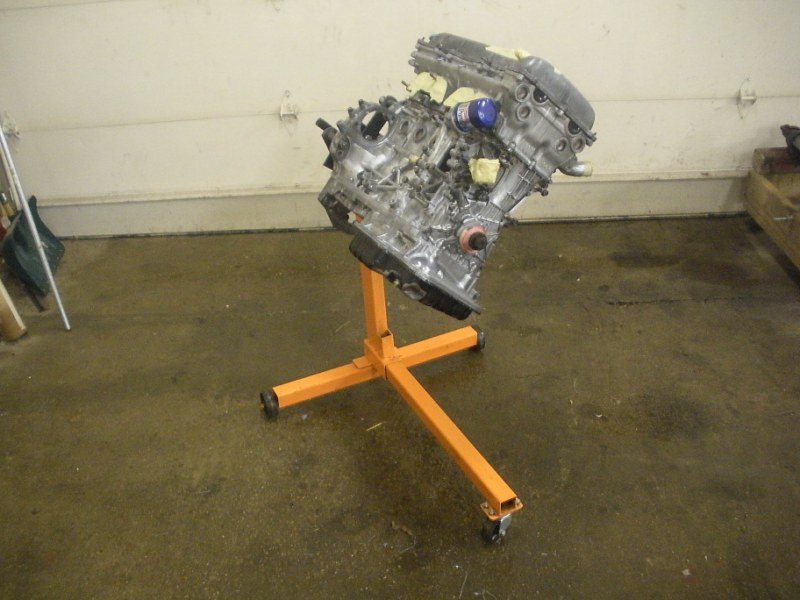 The floor was sprayed down with water before painting to avoid kicking up any dust. | |
|
| | |
slacker
Posts : 86
Join date : 2009-11-21
Location : Madcity area
| | Subject: Re: reviving the G Wed Apr 28, 2010 4:34 am | |
| Motor parts painted: 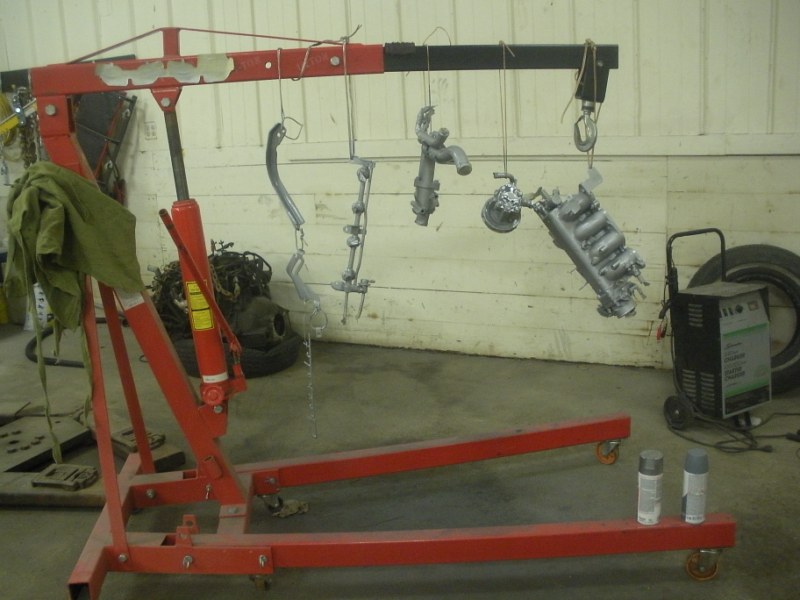 The first round of parts that were sprayed were all done in high temp enamel. 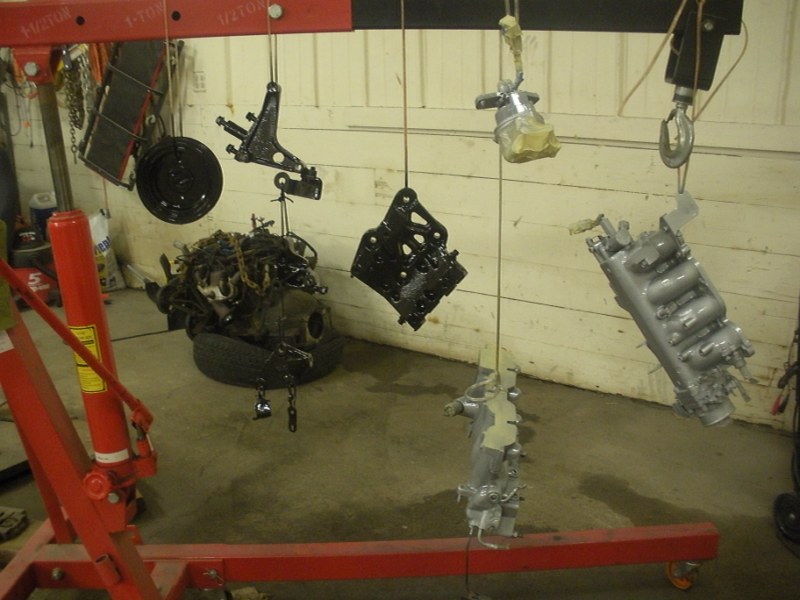 The second round had the cast iron parts as well. The black was nothing more than krylon flat with some clear sprayed over it. we'll see how it holds up. I made the mistake of painting the exhaust EGR tube in black as well.. I give it 3 hours tops before it's all flaked off!! I may ditch the EGR once this setup is installed and running. 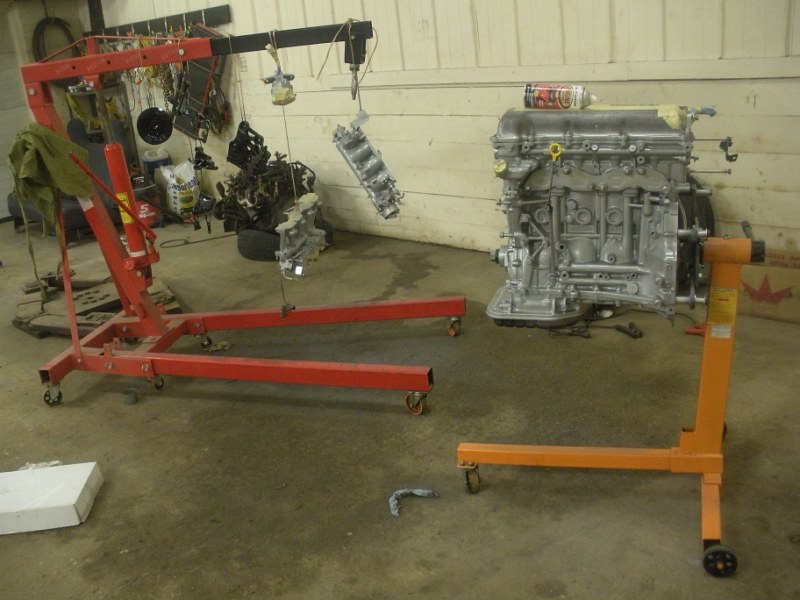 a shot of some of the parts after a couple coats and the block after 2 coats.  Gyeah. Get one. 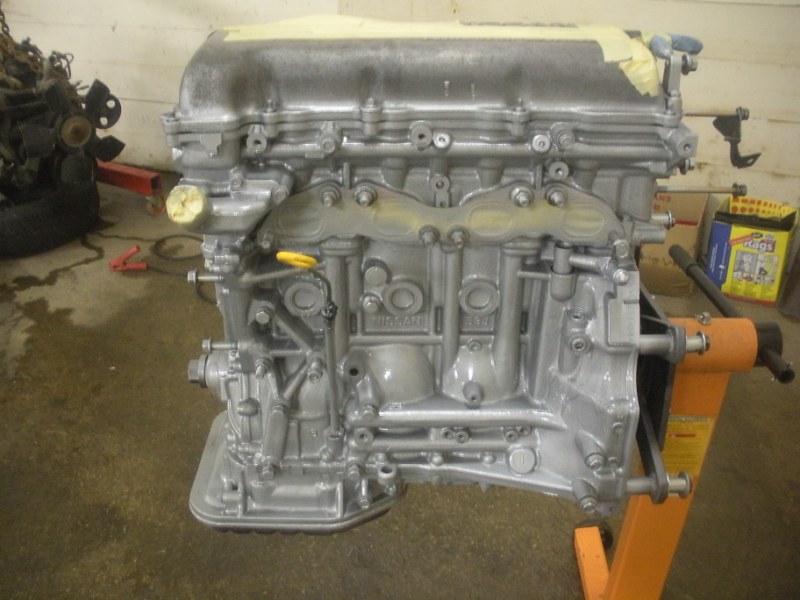  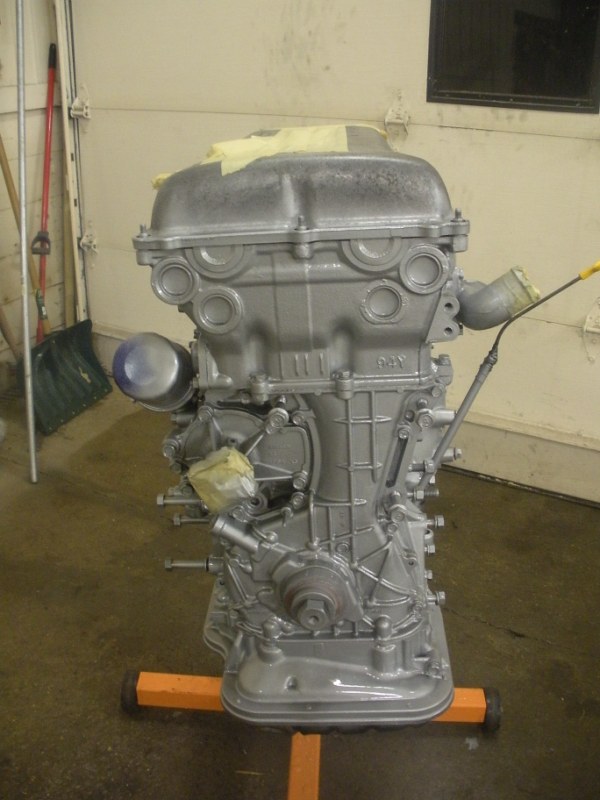 final few coats of clear have been applied. You'll notice that I used the old valve cover gasket and painted right over it. I opted not to paint the valve cover seeing as I'll be reinstalling my Infiniti cover once I decide on how it'll look. I also chose not to paint the lower oil pan as it's got a couple dents in it. I think the one on the other motor is in better shape. I did RTV this one on however, just to make sure nothing was able to get into the motor that shouldn't be in there. | |
|
| | |
slacker
Posts : 86
Join date : 2009-11-21
Location : Madcity area
| | Subject: Re: reviving the G Wed Apr 28, 2010 5:05 am | |
| motor reassembly: 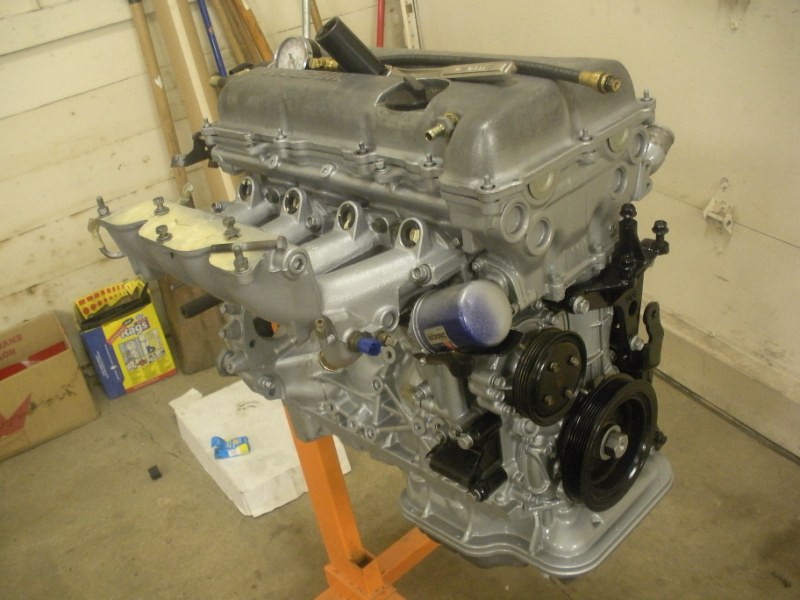 runner's are back on along with the motor parts. It's looking like an engine again! 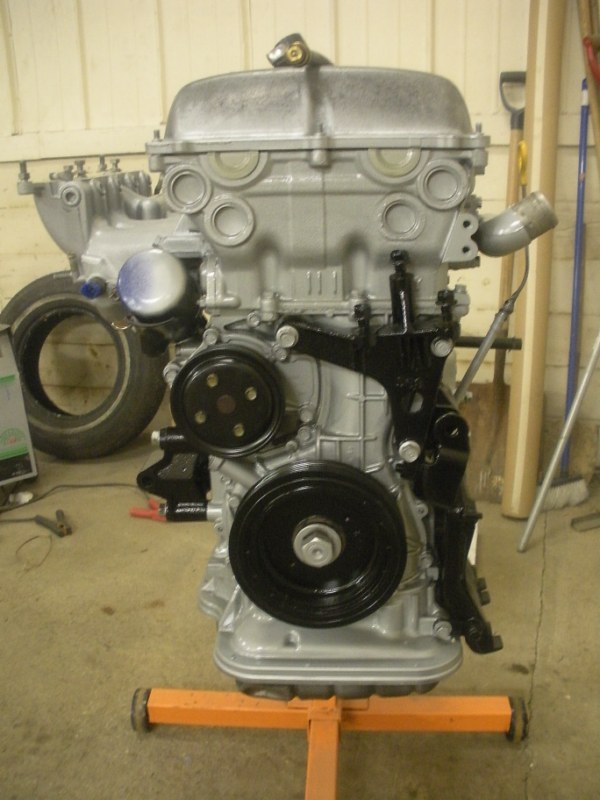 Front side. I did end up painting the crank bolt black. It would look way better with a new valve cover gasket and oil filter.. 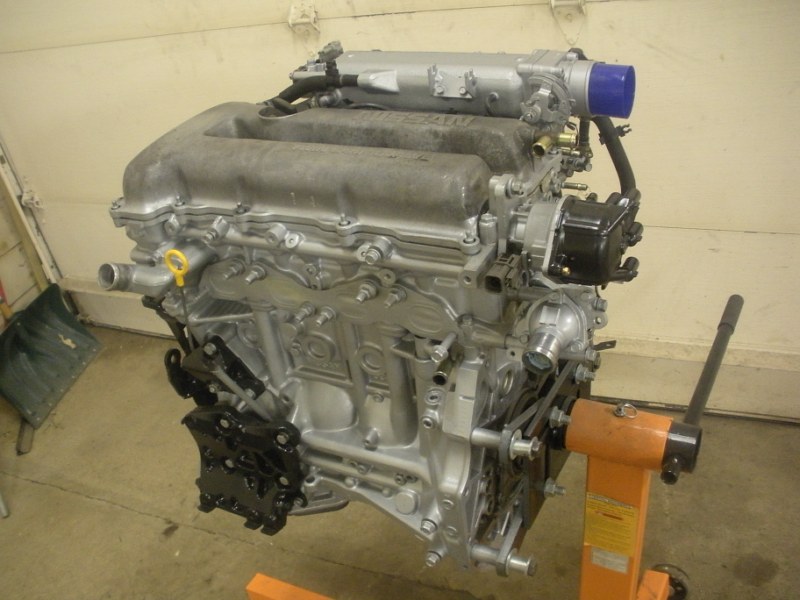 Distributor is back on along with the plenum. 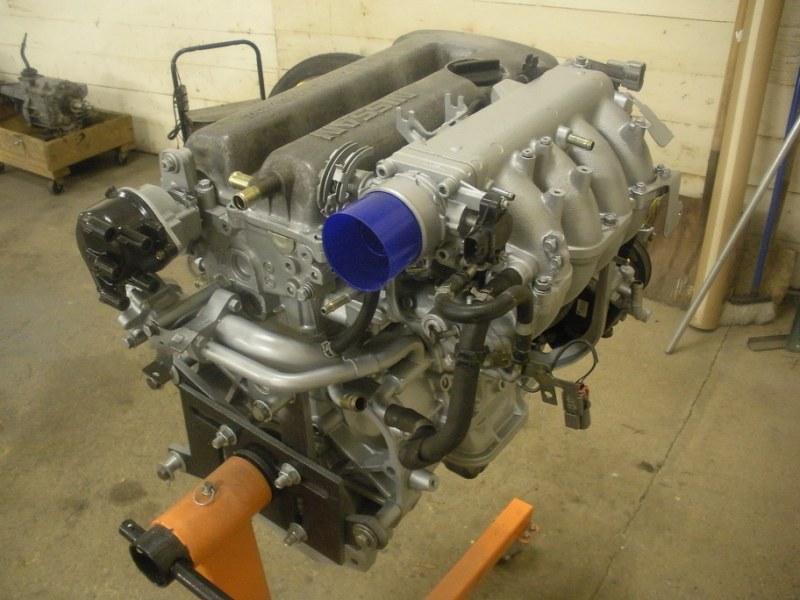 got that foamy engine bright cap keepin' the dirt out my intake!! really tho, coolant lines are back on. They look a little nicer than that rusty zinc plated garbage that it used to be. AND NOW FOR A FEW PICS IN THE SUNLIGHT..  I'll admit, I didn't think too much of this enamel until I looked at the motor in natural daylight. It's a metallic but that's not easy to make out on a rough cast surface. I'm happy with it.. for now  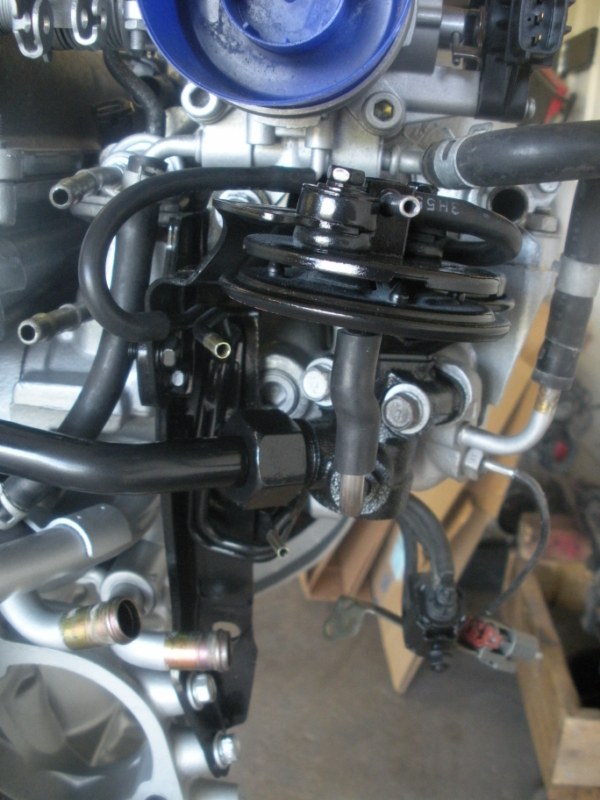 for now, I plan on retaining the EGR. I'd like to make the motor run how it should before I go modifying things. I don't know what hoses go where for the three small lines in this pic. The one on the top of the EGR vacuum valve, the one to the lower left of the valve (directly left of the rubber hose under the EGR vacuum valve) and the one that is just below the hardline fitting that goes to the exhaust manifold. I'm not referring to the two fuel lines on the far left of the pic nor am I the coolant lines that go to the heater core. 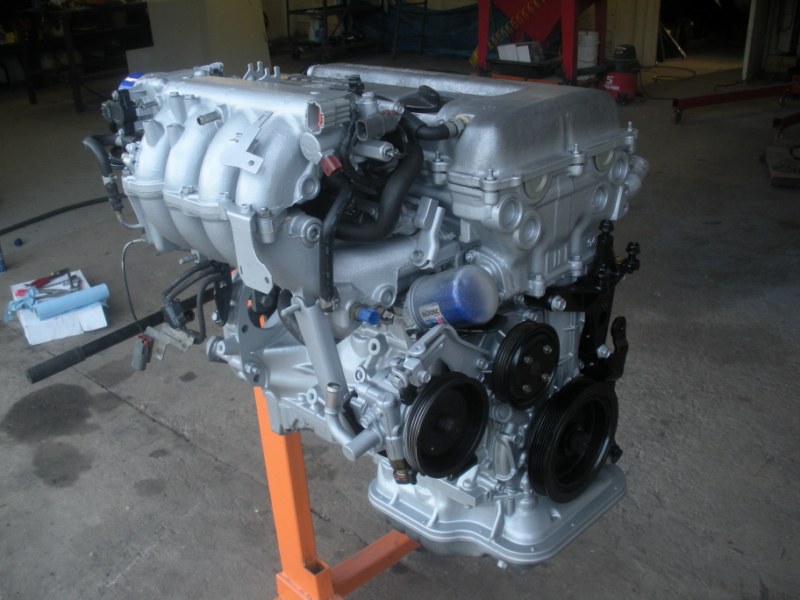 it's in one piece! or at least, it's as far together as I can make it at this point.  the side you'll never see 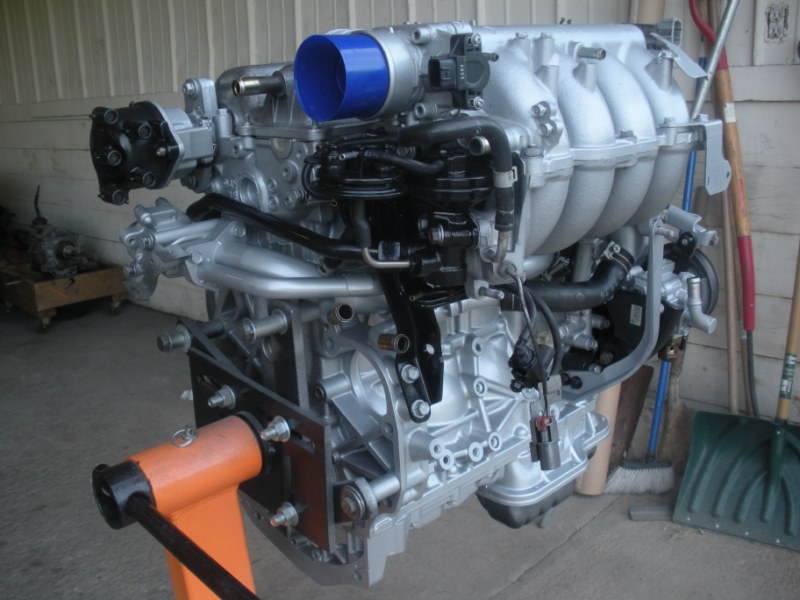 That EGR crap sure does take up a lot of room.. Maybe I will ditch that ASAP....   more to come... | |
|
| | |
Big Ben
Admin

Posts : 732
Join date : 2009-09-23
Age : 42
Location : Madison, WI
| | Subject: Re: reviving the G Wed Apr 28, 2010 8:00 am | |
| Looks great man. I cant wait to see the final outcome! | |
|
| | |
xCONWRATHx

Posts : 551
Join date : 2009-11-19
Age : 33
Location : Sun Priaire, WI
| | Subject: Re: reviving the G Wed Apr 28, 2010 10:13 am | |
| Nice work! BTW my boss says I can't come out and play this weekend... | |
|
| | |
BusinessMan_24
Posts : 299
Join date : 2009-11-19
Age : 36
Location : Kaukauna, WI
| | Subject: Re: reviving the G Wed Apr 28, 2010 10:26 am | |
| | |
|
| | |
BORNGEARHEAD

Posts : 246
Join date : 2009-11-18
Location : Madison, WI
| | Subject: Re: reviving the G Wed Apr 28, 2010 10:40 pm | |
| Looks good!
As for the cam timing, the crank should be at 0. The exhaust cam should be dead nuts straight up. Then count that there is 20 links between the exhaust cam sprocket mark and the intake cam mark. This is how I always do it. If your a tooth off, you should notice it. It's trickier to get the intake cam "at 10 oclock" so I always count out the links.
Here's Jim Wolfs cam install with pics.
http://www.jimwolftechnology.com/wolfpdf/CAMINSTALLINSTFORSR20.PDF | |
|
| | |
slacker
Posts : 86
Join date : 2009-11-21
Location : Madcity area
| | Subject: Re: reviving the G Thu Apr 29, 2010 1:18 am | |
| thanks fellas. The car is still a long ways off but getting it to run again will be a great start!
Connor, no big deal. We'll figure it out. I'll let ya know if I need anything! | |
|
| | |
slacker
Posts : 86
Join date : 2009-11-21
Location : Madcity area
| | Subject: Re: reviving the G Fri May 14, 2010 12:12 pm | |
| - BORNGEARHEAD wrote:
- Looks good!
As for the cam timing, the crank should be at 0. The exhaust cam should be dead nuts straight up. Then count that there is 20 links between the exhaust cam sprocket mark and the intake cam mark. This is how I always do it. If your a tooth off, you should notice it. It's trickier to get the intake cam "at 10 oclock" so I always count out the links.
Here's Jim Wolfs cam install with pics.
http://www.jimwolftechnology.com/wolfpdf/CAMINSTALLINSTFORSR20.PDF Wow, somehow I didn't see that until recently. Thanks for the help, dude. sorry to make you type that out twice. anyway, haven't made a ton of progress since I've been back to work. I did take a minute to clean up today after installing the tranny on the engine. I temporarily put the front end back together and plan on pressure spraying under the hood. Here's a pic of how it looked before the swap (sans battery/dizzy/misc. other parts).  here's a couple pics with some of the stuff out of the way.. 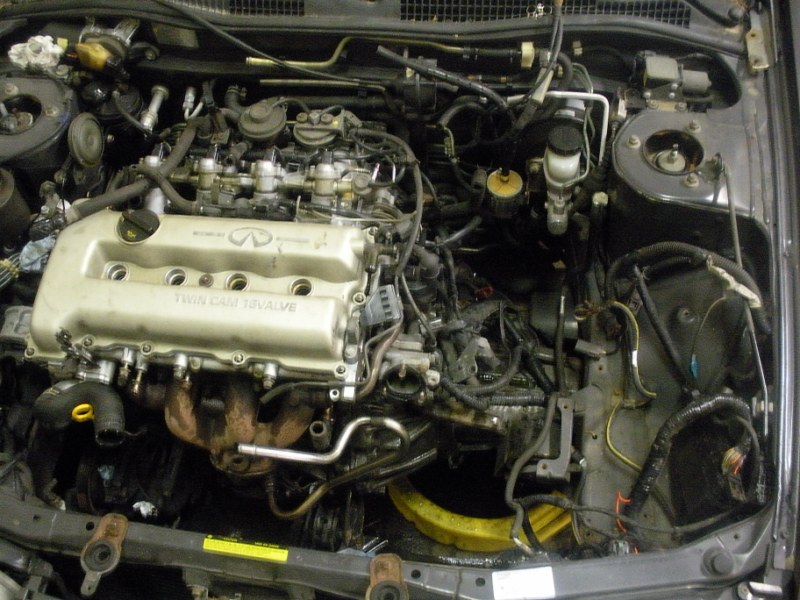 I'm planning on doing a different battery tray. Not sure if I'll relocate yet or not. I also plan on putting all of the fuse and breaker centers together under the hood. the one to the far passenger side will likely stay tho. Also doing some generic intake for the time being to get rid of the air box. 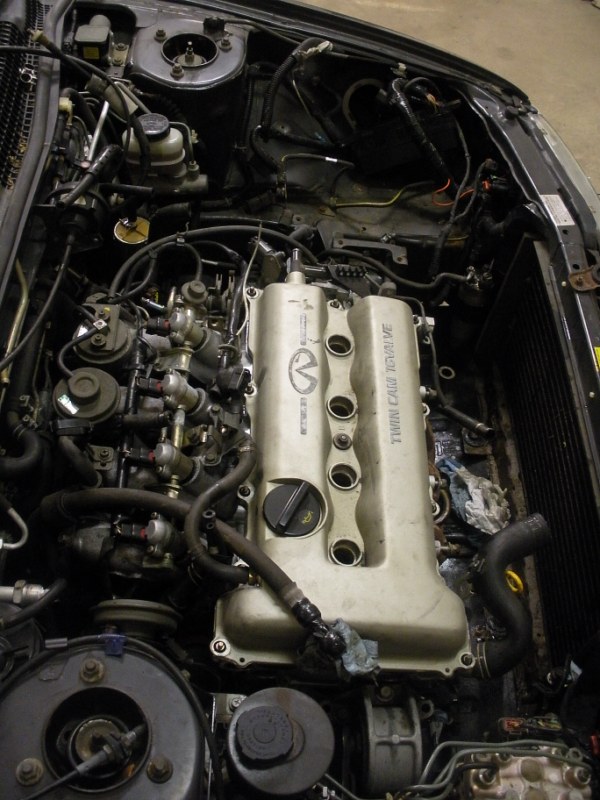 The radiator is out. hard to tell here but one of the mounts is rusted pretty badly. I'll be reinforcing it with 2" wide, 1/8" thick steel strap. It'll be way stronger and I won't have to worry about it happening ever again. 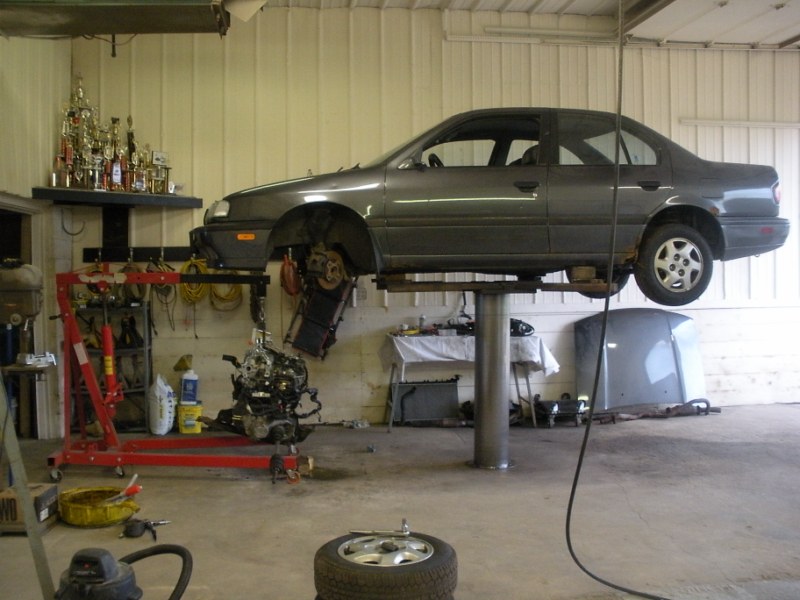 this moment was full of WIN. If you can't tell what's going on here, there is a single post (in ground) hoist in the shop where I live. That combined with a cherry picker equipped with a load leveler means making quick work of getting that motor out of there once the harness was thru the firewall. Here's a couple of the engine bay without the motor or tranny installed.. 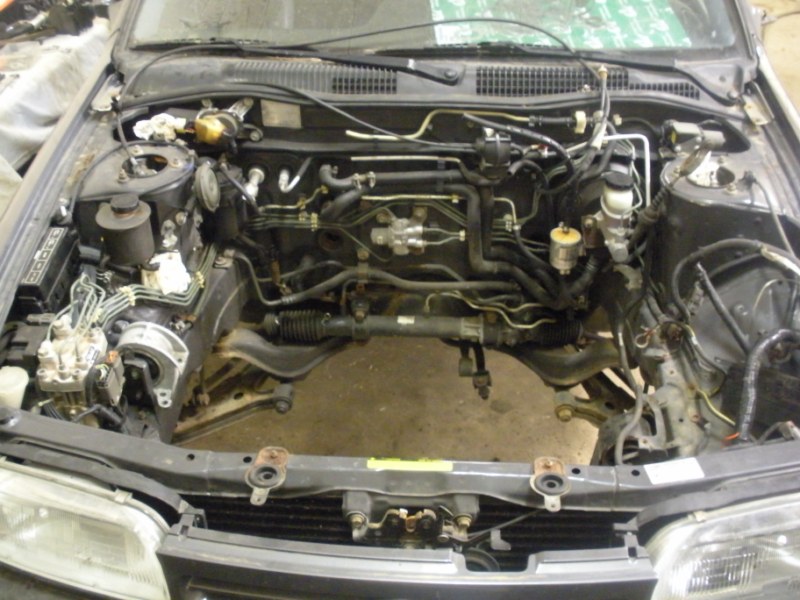 Doesn't look that dirty with the flash off! 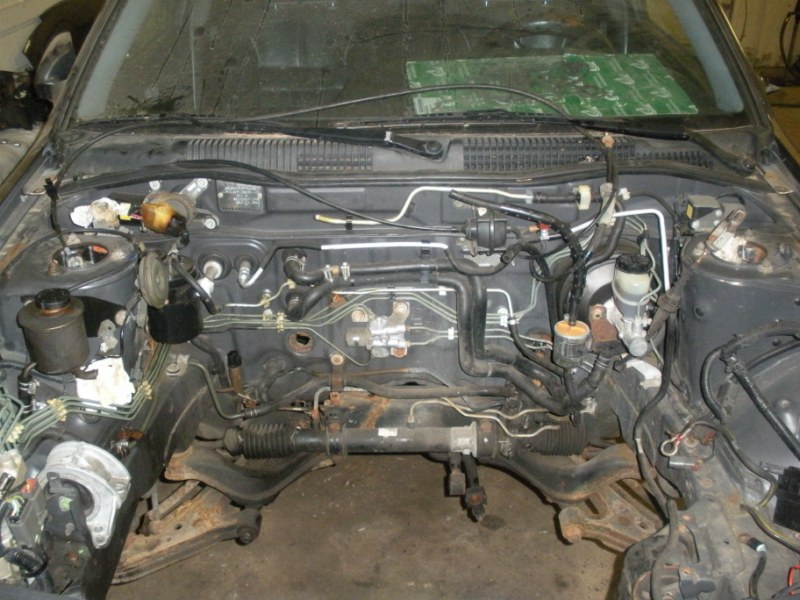 you can better see the dirtyness going on if I use the flash. A little pressure spraying and a bit of rubberized undercoating should clean things up a bit! 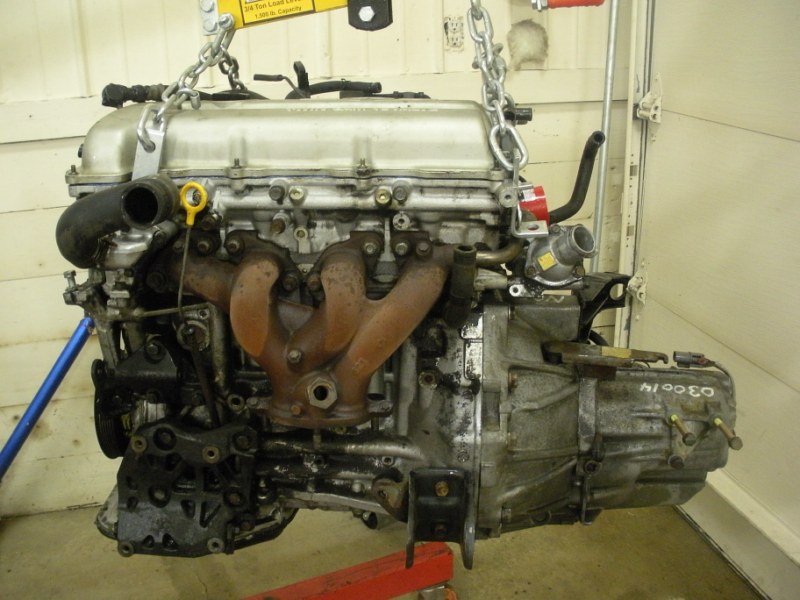 what I pulled out of there. 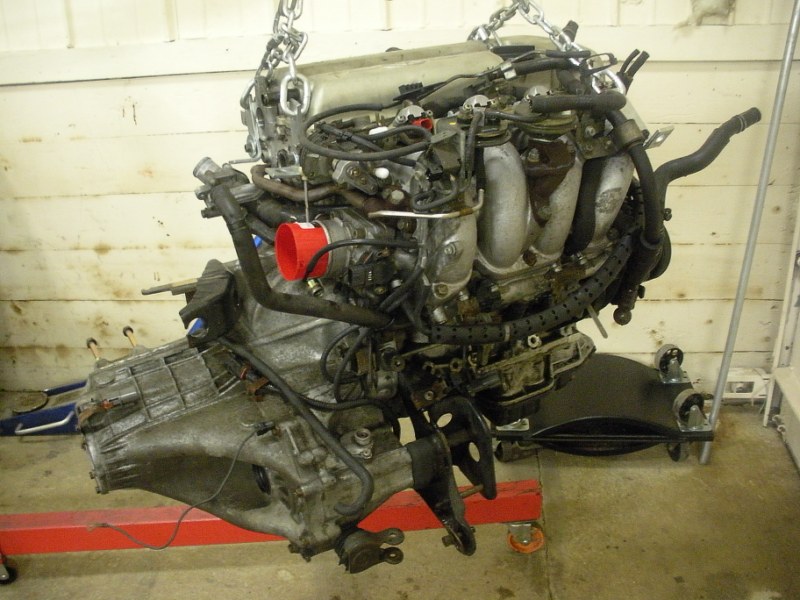 I'm glad Nissan was able to keep the majority of the mess on the firewall side of the engine. I've got a bit of work to figure out how to retrofit the vacuum setup from this intake setup onto the lowport motor. I'm hoping that my buddy Connor will stop by in the near future so I can use his for a diagram **hint, hint** I'm looking to make the new setup run with as many factory settings in place as possible in the beginning. Once it's running well, I'll work towards ditching the EGR and other ugly stuff. 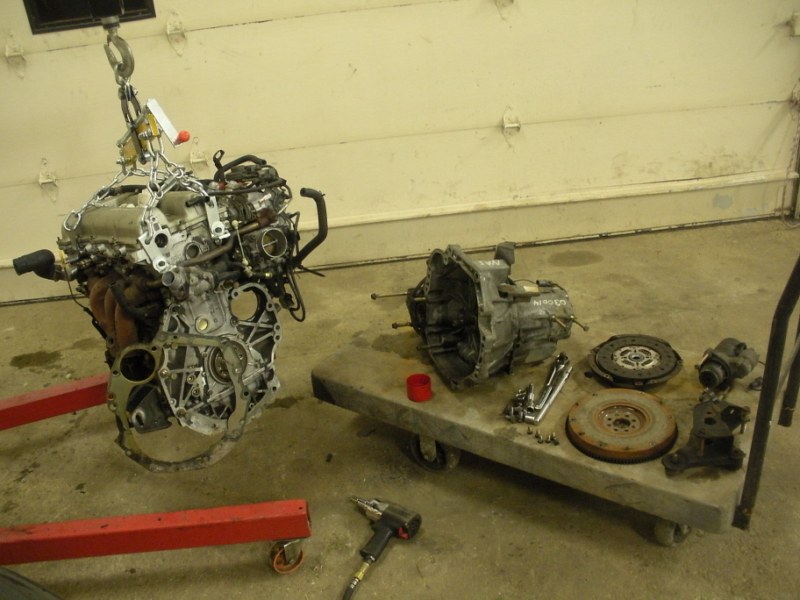 the clutch set up and the flywheel still looked good from when I recently replaced the tranny. I had maybe a couple thousand miles on it before the highport popped. 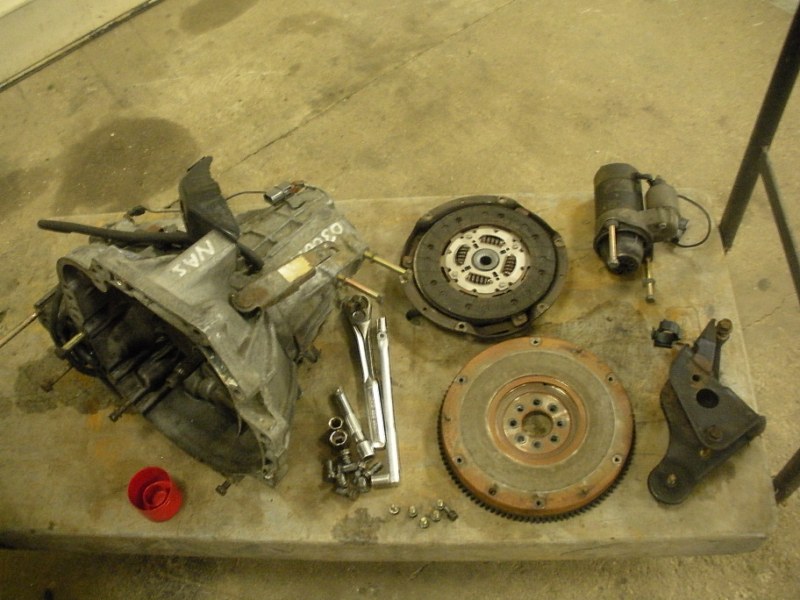 closer look at the clutch stuff. Factory flywheel (obviously), b15 (double sprung) factory nissan clutch disc, factory (or whatever it was last replaced with) pressure plate. I could still see the resurfacing marks on the flywheel and pressure plate surfaces. The clutch plate is just starting to smooth out. There wasn't any junk on anything and the inside of the bellhousing was pretty clean too. | |
|
| | |
slacker
Posts : 86
Join date : 2009-11-21
Location : Madcity area
| | Subject: Re: reviving the G Fri May 14, 2010 12:29 pm | |
| the tranny was pretty clean yet but it did need some time with the wire brush attached to the power drill before being ready to prep. I decided I should use primer on this stuff this time seeing as I learned the hard way what happens when you DON'T use it  anyways.. here's a bunch more pics. 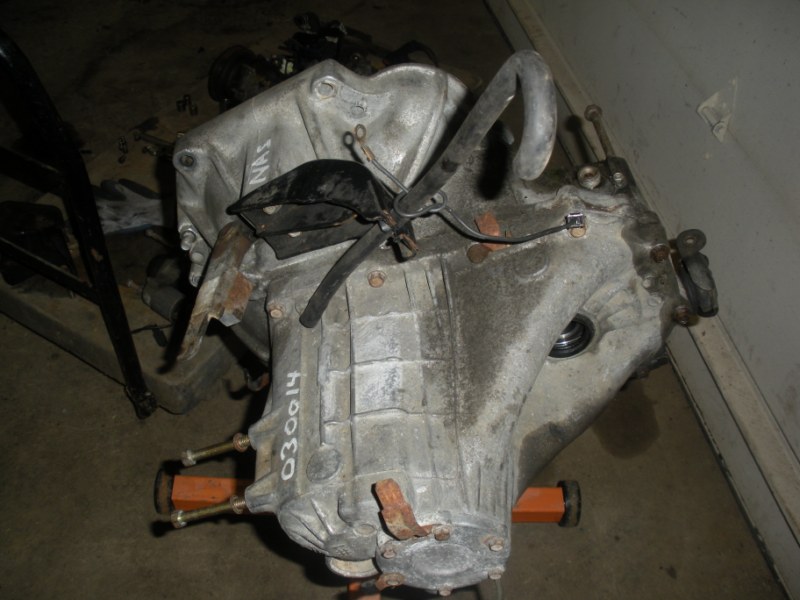 Axle seals were still good and the oil came out VERY clean. I may even be switching to redline on the upcoming refill. 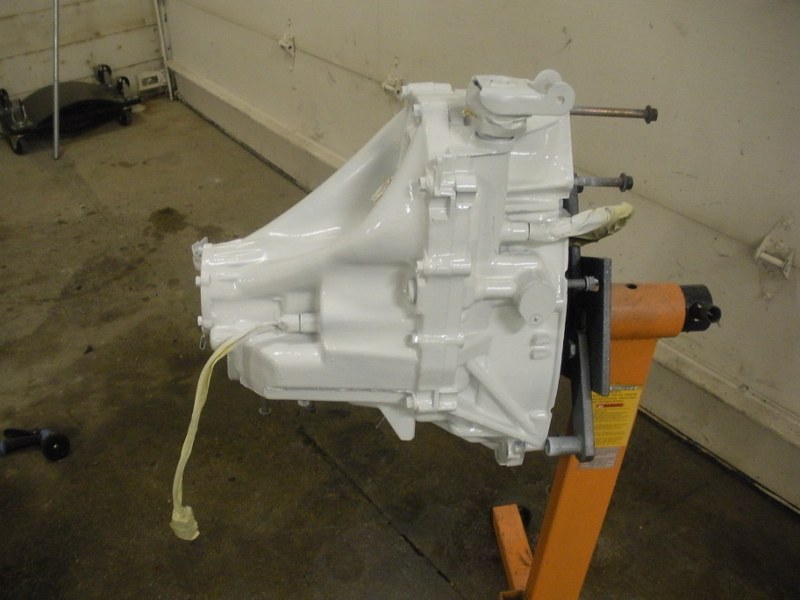 I was a little surprised when the primer came out of the can in a bright white!! I figured it would help the metallic enamel pop a little more and I was right. It also layed out nicer across the surface too.  it's still drying in the pic but it was flat and chalky looking when it dried. 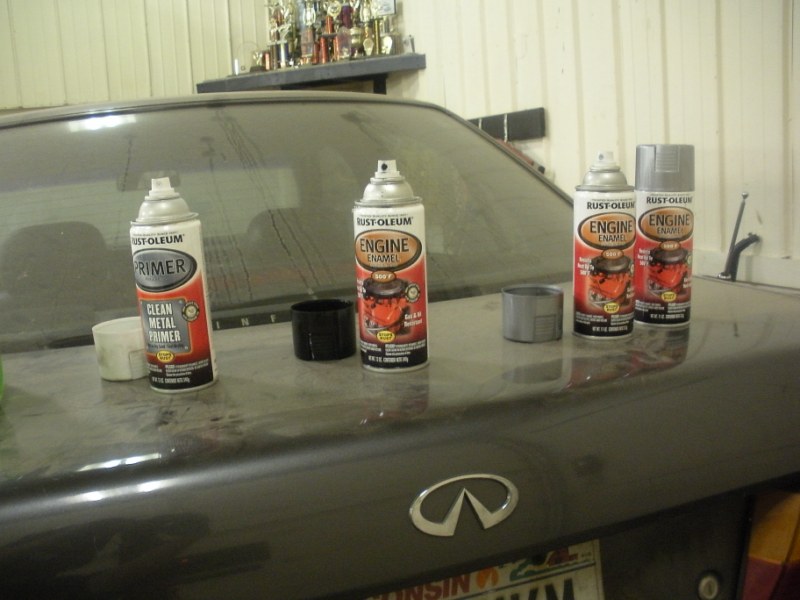 incase you like my results, this is what I was using. I got it at autozone. ~$5-6 a can IIRC. | |
|
| | |
slacker
Posts : 86
Join date : 2009-11-21
Location : Madcity area
| | Subject: Re: reviving the G Fri May 14, 2010 12:41 pm | |
|  a quality Nissan part happy to be getting cleaned up! 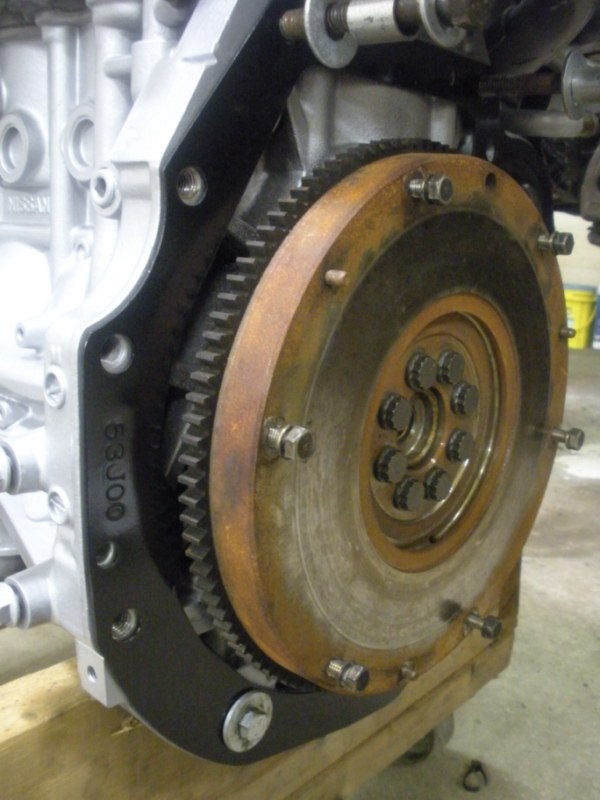 I didn't take any time to make the flywheel look pretty. It lives in the dark, it can be ugly. The surface was cleaned with brake cleaner before assembly. 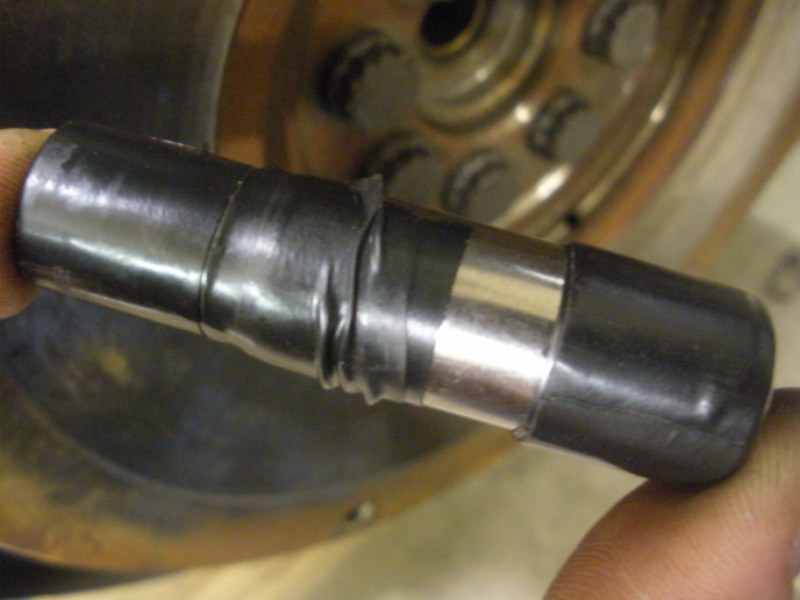 I was having a hard time trying to remember what I used for a clutch alignment tool until I had to grab a 10mm deep socket. a couple wraps of super33 and I was ready for action. perfect fit! 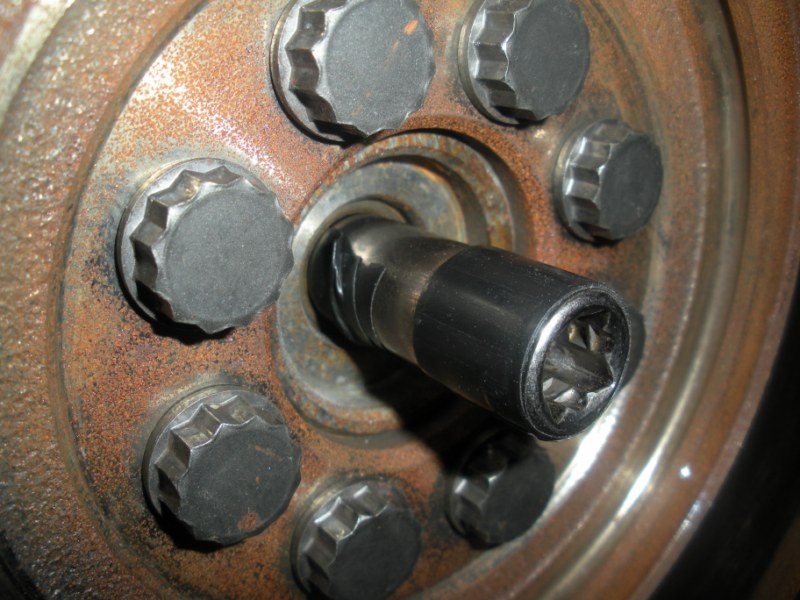 the smaller diameter end was wrapped 2 1/2 times plus a small piece on the bottom to act as a shim. The beveled portion of the shank was also shimmed with double thick tape so it wouldn't move at all when fully inserted into the bearing in the center of the flywheel. Craftsman 10mm socket was used, in case you were wondering. 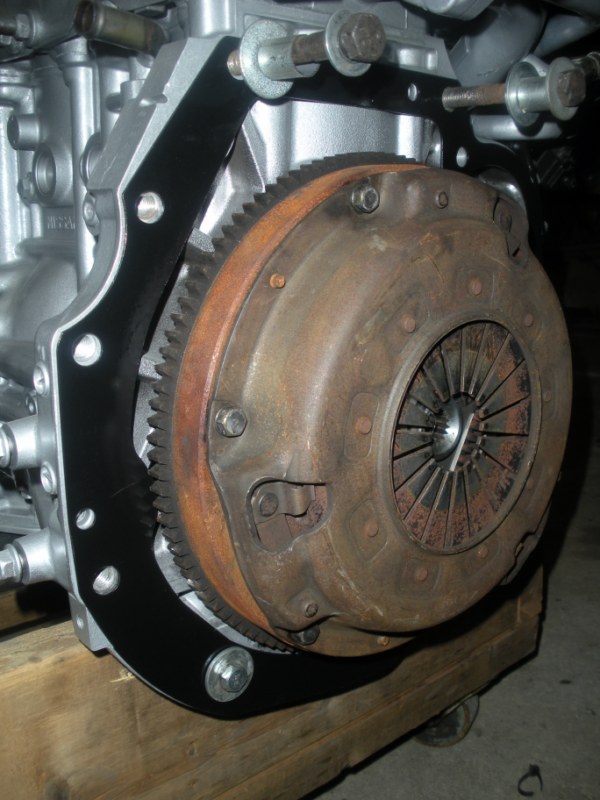 again, I'm not too concerned with beauty at this point. It just needs to work. | |
|
| | |
xCONWRATHx
Posts : 551
Join date : 2009-11-19
Age : 33
Location : Sun Priaire, WI
| | Subject: Re: reviving the G Fri May 14, 2010 12:45 pm | |
| I can come by whenever man, yesterday was my last final. But I work all weekend. | |
|
| | |
slacker
Posts : 86
Join date : 2009-11-21
Location : Madcity area
| | Subject: Re: reviving the G Fri May 14, 2010 12:51 pm | |
| 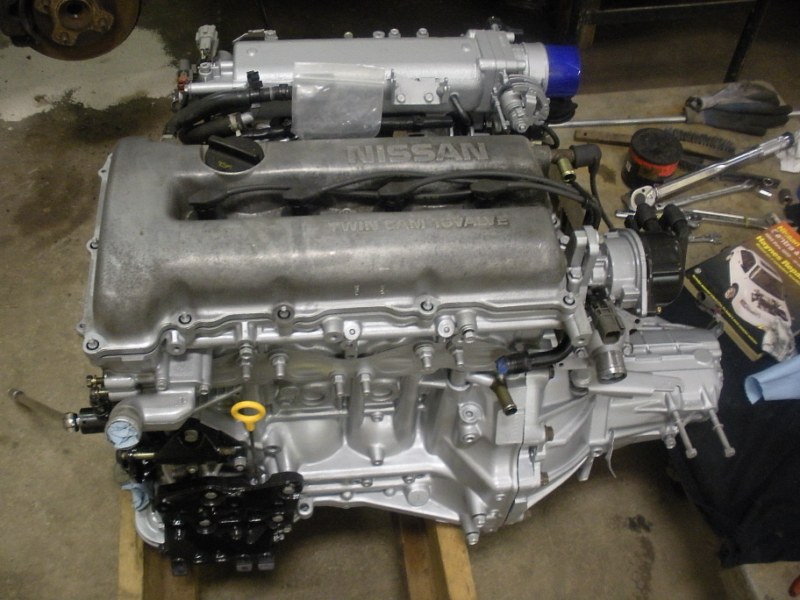 tranny is finally installed. It didn't want to go in at first. After a small session of swearing and installing a few bruises on both my legs and forearms, I finally won the fight. 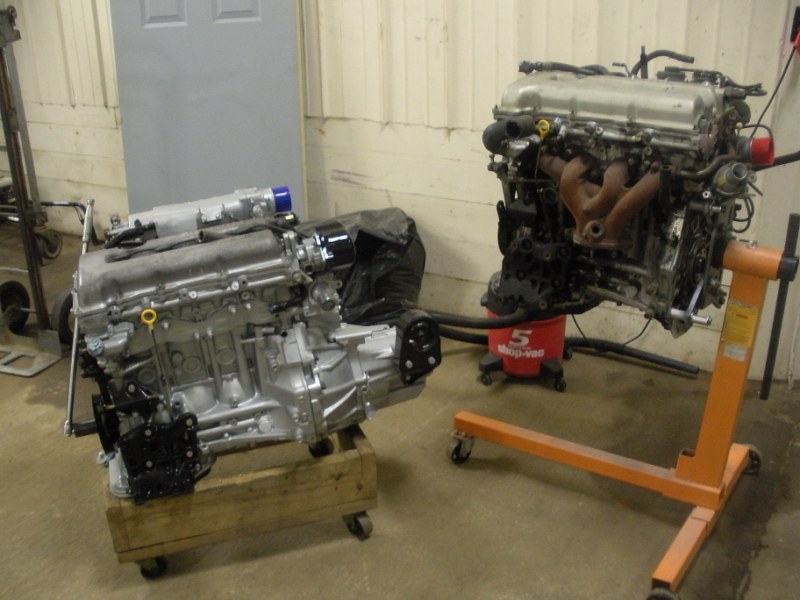 after looking at the mounting plate on the old and the new motor, I'm betting that the A/C compressor is different on the lowport motors. That would have been right about when they went from R-12 to R134a. The large bracket is a slightly different shape and the offset for the mounting holes of the compressor is different too... if this is the case, I'm in the market for a lowport A/C compressor!!! I want to retain my luxuries seeing as this will be the daily driver and I have a long commute to work. I'll also be sticking with the factory exhaust manifold until I can afford a header :\  as it sits. MORE TO COME! | |
|
| | |
slacker
Posts : 86
Join date : 2009-11-21
Location : Madcity area
| | Subject: Re: reviving the G Fri May 14, 2010 1:01 pm | |
| - xCONWRATHx wrote:
- I can come by whenever man, yesterday was my last final. But I work all weekend.
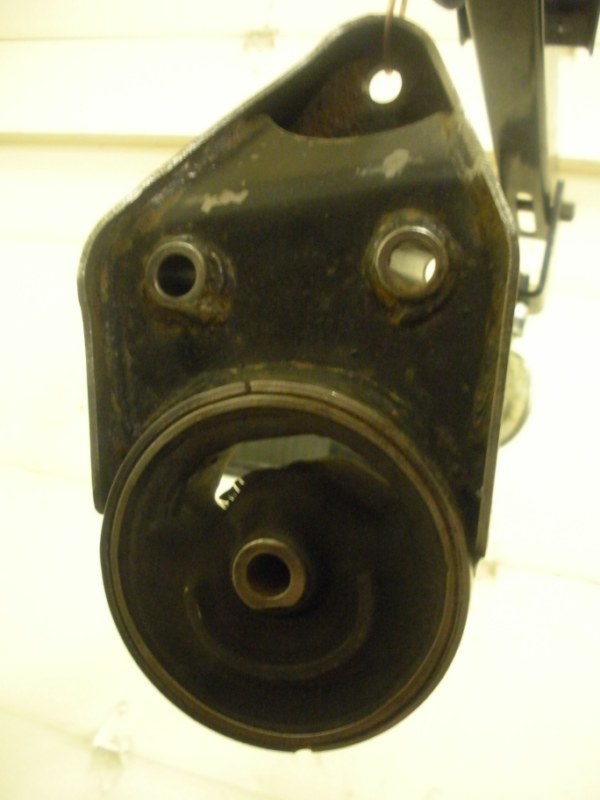
that's fine! I work on the weekends again now anyway. Maybe we can hash some stuff out on weds or thurs of next week and maybe get Squirlz to stop by on his way home from work. I need to get my CV's checked out and I have a inner tie rod boot to replace but otherwise not much to do on the front chassis stuff.. I know sway bar links are in order but that's about it. OH.. and I should probly ask, does anyone know if you can buy just a balljoint boot or tie rod boot without buying the ball and stud setup? my lower balljoints were almost new but I butchered the rubber boots while trying to get them to separate with my pickle fork on an air hammer...  | |
|
| | |
squirlz
Posts : 384
Join date : 2009-11-19
Age : 43
Location : New Glarus, WI
| | Subject: Re: reviving the G Fri May 14, 2010 1:22 pm | |
| The blocks are the same so the AC bracket should bolt up to match the compressor.
I dont think you can get the boots separate, i thought someone was ranting about that on the dash.
BTW, i have a clutch alignment tool you could have borrowed. | |
|
| | |
slacker
Posts : 86
Join date : 2009-11-21
Location : Madcity area
| | Subject: Re: reviving the G Fri May 14, 2010 1:36 pm | |
| - squirlz wrote:
- The blocks are the same so the AC bracket should bolt up to match the compressor.
that sounds about right. do you still have a compressor laying around? I wonder if the ports are the same size.. if not, I wonder what else would have to change to run r134a thru a r-12 system.. hmmmm - squirlz wrote:
- I dont think you can get the boots separate, i thought someone was ranting about that on the dash.
soooo stupid. that's how they make their money I guess. 30seconds worth of labor and no part doesn't make them money. It's the 1/2 hour labor and a $25 part sale that we're concerned with here  - squirlz wrote:
- BTW, i have a clutch alignment tool you could have borrowed.
oh well. made one easy enough! my pressure plate bolts didn't drive in as tight as I figured they would. the Chiltons said ~65 Lb/ft but I was too scared to tighten them that hard. I made sure to use locktite so I'm hoping they will hold! They got to 40Lb/ft or so. Didn't want to pop a bolt or two so that's where they're gonna stay until I have a reason to take it all back apart again | |
|
| | |
Sponsored content
| | Subject: Re: reviving the G | |
| |
|
| | |
| | reviving the G | |
|


